Showing posts with label lesson plans. Show all posts

March 26, 2008

If You Lived during the Trail of Tears Lesson Plan


For our third week of class Rhiannon really wanted to do a Native American tribe. She wanted to focus on the Nez Perce (because of Kaya,the American Girl doll)and I wanted to focus on the Cherokee and Trail of Tears. So we compromised and talked about Native American tribes in general with emphasis on different aspects of different tribes.

We began the class with some general talk time with facts about Native Americans. I used the Kaya doll, her horse,saddle, cradelboard and clothing along with other artifacts to describe some of Native American life. A member of our cooperative is part Cherokee and brought in a real Cherokee cermonial spear with eagle feathers and beading. My co-teacher held it up and talked about why Native Americans can have eagle feathers but no one else can. We did not allow the kids to touch the spear but they were all fascinated by it.

Next I gave a very brief overview of the time of the Cherokee and set up for the Trail of Tears. We gathered the students and their belongings: coats, backpacks, sweatshirts etc. We marched them through and outside the building taking away personal items as we went (making them just drop the items wherever we told them). I roughly walked them through the events and we made kids lay down (as if they died)and made them leave friends behind when they were sick. We started with 15 and only 4 made it back to the classroom. We gathered everyone together again and talked about the events and how it was like that during the trail of tears. I gave them a handout to add to their books (can be viewed at end of post).

Then we divided them into three groups and moved through four stations:

Weaving
Design and Symbol Painting
Stickball
Food and Props


Station 1 - Weaving
Using newspaper the kids will experience weaving. The goal of this station is for everyone to try it and understand a bit more about weaving - they will NOT have a take home project from this. The setup will be for one big weaving project that way the focus is on the experience of weaving and not trying to get everyone to finish a project. We taped newspaper strips to the table and then used other strips to show them how to weave. The teacher here talked about weaving baskets, showed some pictures from a book and was able to share a real story she had of someone weaving natural fibers for her family with them standing there.


Station 2 - Designs and Symbols
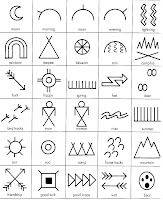
The second station will be an opportunity for the kids to draw Native American symbols. You will need brown construction paper , a brown paper roll, or the inside of paper bags. You need enough for each student to draw his or her hand and cut it out and I suppose some reserve for mistakes. After they cut it out they will be drawing a story using Native American symbols on their hand. We used a boook with different tribal symbols and talked about the importance of symbols to the culture.
After they finish their hand/stories they can cut them out and glue them in the book. I will also make up a handout of the Trail of Tears for them to glue in the book.

Station 3 - Stickball
Using lacrosse sticks and balls we will let the kids get a sense of what Native American stickball was like. As lacrosse sticks are very similar to a traditional stick ball game they played. This game was a hit with the kids and we did not even get to the second game which was:

DISK AND POLE
You will need two small plastic plates - try rolling them on their side they should be able to run along a floor like ours for a bit. Then four sticks - roughly of equal lengths. Try to keep them on the smaller side - big enough to throw small enough to be safer. The game is played by one person rolling the plate and the others throwing their sticks to land where they think the plate will stop.

Station 4 - Food and Artifacts

We served cornbread dry and water. It was not their favorite snack so far. We talked about why they cooked with so much corn. The kids got to look at the clothes and artifacts. I also shared some pictures from various books of items that we did not have for them to actually see.


Trail of Tears Timeline(handout)

1830 Indian Removal Act: While Indian removal was, in theory, supposed to be voluntary, in practice great pressure was put on American Indian leaders to sign removal treaties. Most observers, whether they were in favor of the Indian removal policy or not, realized that the passage of the act meant the inevitable removal of most Indians from the states.

1835 Treaty of New Echota removal treaty of Cherokee nation in which United States agreed to pay the Cherokee people $5 million in compensation, cover the costs of relocation, and give them equivalent land in the Indian Territory of Oklahoma in exchange for all Cherokee land east of the Mississippi. Was never ratified officially by Cherokee nation

1838
May Cherokee roundup begins May 23, 1838. Southeast suffers worst drought in recorded history.
June First group of Cherokees driven west under Federal guard. Further removal aborted because of drought and "sickly season."
July Over 13,000 Cherokees imprisoned in military stockades awaiting break in drought. Approximately 1500 die in confinement.
October For most Cherokee, the "Trail of Tears" begins.
December Last group leaves Cherokee homeland carrying the records and laws of the Cherokee Nation. 5000 Cherokees trapped east of the Mississippi by harsh winter; many die.

1839
January First overland contingents arrive at Fort Gibson.
March Last group reaches Oklahoma. More than 3000 Cherokee die on Trail of Tears, 1600 in stockades and about the same number en route. 800 more die in 1839 in Oklahoma.
April Cherokees build houses, clear land, plant and begin to rebuild their nation.
May Western Cherokee invite new arrivals to meet to establish a united Cherokee government.
September Cherokee constitution adopted on September 6, 1839. Tahlequah established as capital of the Cherokee Nation.

March 14, 2008

Teen Christian Music Class


This semester I am teaching a very fun class at our homeschool cooperative - a class that practically teaches itself and has been interesting for the students and fun for me. Our co-op is Christian based and I thought teaching a music class would be a lot of fun, discussing contemporary music and what it means, how it makes us feel, etc. I gave the students the one guideline that all the music they chose had to be on a Christian label and be acceptable to their own parents - otherwise anything went. Any music style and we have seen quite a few from pop to heavy rock, alternative to praise, rap to ballads, latin to punkish. It has been interesting and fun. Class discussion has been good and everyone seems to be enjoying it.

Before class began I asked the students to fill out a survey of music they liked and did not like, list their top ten bands and pick ten songs to discuss in class. We have 15 students (7 boys and 8 girls, ages 13-17) so that was 150 songs to chose from. There were some students who did not offer 10 songs and there was quite a bit of overlap in favorite songs and bands. I still had a lot to chose from for just 6 weeks of 55 minute class sessions.

The plan was each week for them to listen to the music at home ahead of time and have the lyrics available to be read and then discuss the songs in class. The first week of class we opened with some discussion and focus for the class. I discussed music as modern day poetry and talked about the power of lyrics. We talked about how music raises certain emotions and thoughts in us, charging us up or helping us to mellow out.

To illustrate the point that sometimes the medium is the message (the music itself creates the message irregardless of lyrics) I played three very different versions of the same song - a Christmas carol, Angels we have heard on high. One version was typical Christmas chorus with a big choir, another version was a Celtic folk version and the last was a rock/punk version done by a band that made 80% of the top 10 bands list for all the students (interestingly one of the few to cross gender lines).

Lastly I set up five loose classifications or groupings for the purpose/meaning of the music we would listen to. I mostly did this to facilitate class discussion and provide some easy tools to begin listening to and looking at music differently. I think it helped the students to evaluate the music more and initially dig in a bit below the surface. As class progressed this tool was used less and less (as I hoped it would be) as they moved into richer discussion about the songs. Still every once in awhile we come back to these groups as they provide a common understanding and a simple way to express a bunch of similar things about songs.

Here they are:

Praise/Worship -
fairly easy to spot and label - church, youth group, KTIS, directly to or about God. Most often personal about you and God. Good praise and worship should not be a song you can replace your girlfriend or boyfriends name in - but is unique to God. Much is watered down praise so people can stick loved ones names instead. Modern day psalms

Dealing with the World -
Discussing every day issues and world events through music and the way we need to manage them. Sometimes strategies are offered, sometimes just emotions or causes are expressed. often it will be a mix of all. Relationships, politics, health issues, families, etc

Faith Strengthening and reminding -
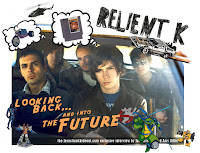
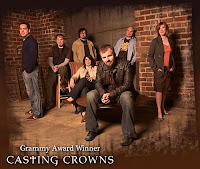
written for Christians to remind and encourage them to stand strong in their faith. Casting Crowns, Caedmons Call, Jars of Clay


Evangelism -

Drawing others to the faith with good music and a positive message in the lyrics. most often crossover bands - bands that sound like popular mainstream music

Just for Fun -
most music has a message to it but occasionally you really find some songs that are just pure fun.

Then the fun began. I won't go into all the class discussion here but it was very interesting and I think in the end the students are getting a lot out of it. I would say they definitely feel a sense of ownership as they have picked the music themselves. For the most part all the songs I have selected for the class discussion have come from those initial lists and their band and song preferences. Interestingly I did not end up just choosing their top 3 songs from each list or any simple thing like that. Rather I spent a lot of time listening to ALL the music and selecting a subset of it that offered variety, exposure to lots of musical tastes and styles and went across all the above mentioned categories. Each week we had about 10 songs to choose from for class discussion usually only making it through around 5 sometimes 7 of the songs. In the end I think they had a good mix of music. We are just at the halfway point now - though all the music has been selected, so I will have to give a final class overview.


If you teach this or a similar class you should poll your own students and let them choose the music so they have ownership of the class. I chose Christian labels as a guideline for the class because it filtered out a lot of material I may not have wanted to wade through or enter with some of the younger students and it provided a clear bright line for our class. It also offered parents a certain amount of comfort at what may or may not be talked about and from what general perspectives. That boundary may not be necessary for some others and this could easily be taught in a secular way, you just may have to filter through more.

I think one of the important keys to this class was letting them give me the big set of music to choose from and still maintaining control over what I selected and presented to the group from that. I then gave them back some more control by allowing them to vote on which songs to discuss for the week (from the subset of 10 I had selected for the week). It also allowed me to balance musical tastes and show a wide variety of styles and messages within the class. I had had the freedom to focus discussion in a week around a particular topic (ie different worship styles, different "world issue" songs, and so on).

I really want to compliment my students for the respectful way they dealt with fellow students and music they truly did not care for. Out of 40 songs we have gone through to this point only 1 song has been unanimously liked. Yet they were able to engage with others and share their thoughts and feelings about the music. Some songs brought out strong differing opinions in the students and some others led to different understandings of what the song was about and what it might mean. Overall it has been fun and interesting to getting to know the students more through the music they like as well as the music they don't. They have offered a lot of insight to each other and hopefully learned a few things about themselves, others, music and the world through the process. If nothing else it has been fun for us all.

Our list of songs:

Week One and Two
Lift - Carried Away
Breathe into Me - Red

Strong Tower - Kutless
We Win! -David Crowder Band
What This World Needs - Casting Crowns
America's Next Freak - FM Static

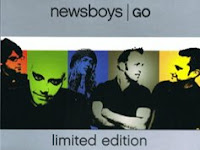
Shine - Newsboys
5 Minutes of Fame - Barlow Girl
Time and Confusion - Anberlin
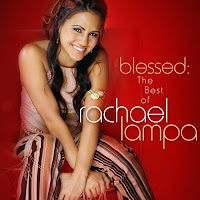
Free - Rachael Lampa


Awakening - Switchfoot
Be My Escape - Relient K

Is Forever Enough - Hawk Nelson
For the Moments I feel faint - Relient K
Thank God I'm Not the One - The Afters
You're Not There - Jaci Velasquez
Famous One - Chris Tomlin
Made to Love - Toby Mac
You - Britt Nicole
Untitled Hymn (Come to Jesus) - Chris Rice
Angels we Have Heard on High - Relient K


Week Three

California - Hawk nelson
Cartoons - Chris Rice
Come Right Out and Say It - Relient K
Dare you to Move - Switchfoot

Deeper Life - Natalie Grant
Eschuchame (listen to me) Jaci Velasquez
I'll Get Over It (Miss elaineous) Everyday Sunday
Jesus Freak - DC Talk

Love Hate (On and On) Disciple

Week Four
Mountain of God - Third Day
Never Alone - Barlowgirl
Never Been Unloved - Michael W. Smith
Ooh Aah - Grits
Paperthin Hymn - Anberlin
Phenomenon - Thousand Foot Krutch
SecondHand Dreaming - Ruth
Upside Down - Zoegirl
We Need Each Other - Sanctus Reel
Whispers in the Dark - Skillet
You - Switchfoot

Week Five

The Everglow - Mae
You LIft Me Up - Rachael Lampa
Speaking in Tongues - The Elms
Dive - Steven Curtis Chapman
Never Take Friendship Personal - Anberlin
Those Nights - Skillet
The Innocent -Kutless
Learn to Breathe - Thousand Foot Krutch
You're My Little Girl - Go Fish
Here I am to Worship - Passion Worship Band

Week Six
Wake Up! Wake Up! - Everyday Sunday
What I thought I wanted - Sara Groves
Who I am Hates Who I've Been - Relient K
This is Your Life - Switchfoot
Head on Collision - Hawk Nelson
Wherever We Go - Newsboys
Why Do I DO - Jump 5
If We Are the Body - Casting Crowns
What if I Stumble - DC Talk
Oh Gravity - Switchfoot

March 13, 2008

If You Lived in the time of the American Revolution


So far I think this was my favorite of the classes in this series. Perhaps it is because we are in the middle of the American Revolution here at home but it was a fun class I think the kids enjoyed. I decided to make the focus of the class walking the students through the history that led the Patriots to rebel against the British in a fairly interesting and interactive way. We used candy to make it most interesting to them.

For the main talk time everyone gathered in a circle on the floor and was given a napkin full of skittles. We had someone be King George, someone be the tax collector and someone be parliament. In the future I would skip the parliament as it made it too complicated. We walked through all the laws and rules passed by the British and took candy from the kids to represent their losses in money/supplies/freedoms. I went through each of the following, briefly explaining it and then having the tax collector take away candy to represent it. For example we took half their candy during the currency act to represent loss of half of money value. For the intolerable acts we "taxed" them for glasses, clothing, shoes, etc) I also handed the following out as a printout the kids added to their books as a reminder of the lesson and overview of the causes of the American Revolution. This is a simplified list that was useful for our class, it is not detailed and comprehensive however.

Causes of American Revolution

French-Indian War
colonists help England fight and win
England decided to tax colonies to increase money and
lower expenses by closing the frontier

The Sugar Act 1764
tax for all sugar, used patrols to enforce

The Currency Act 1764
made colonial scrip (money) illegal
reduced value by half

The Quartering Act 1765
provide barracks and supplies to
house or quarter British troops

The Stamp Act 1765

required government stamps for all official papers
stamp masters tarred and feathered by patriots

Repeal of Stamp Act 1766
Parliament repealed under pressure
America's first victory

The Townshend Acts 1767

taxes on imported goods such as
glass, tea, coffee, paper, paint

Writs of Assistance 1767
search any home or business
encouraged neighbors to "tattle" on one another

Colonial Legislatures Dissolved 1767

Massachusetts assembly dissolved by Parliament
due to resistance and encouraging others to resist
-dissolved MD SC and GA as well

The Boston Massacre 1770
shots fired into a crowd of civilians
5 people dead - led to outrage

Townshend Acts and Quartering Act Repealed 1770
all repealed by British prime minister
except tax on tea


The Tea Act 1773

decreased British East India tea essentially
creating a tea monopoly for Britain along with tea tax

The Boston Tea Party 12/16/1773
colonists disguised as Indians boarded tea ships in
Boston Harbor and dumped 10,000 pounds of British tea

The Intolerable Acts 1774
Boston ports closed until lost tea costs paid
Changed and controlled local government structure
New worse quartering act - troops stationed in homes against will

First Continental Congress 1774

colonial delegates meet in Philadelphia to decide on common action
wrote a petition to King George III asking him to intervene
rejected Parliament but said loyal to king
Patriot/Loyalist break

Lexington and Concord Battles 1775

The war begins

Some Famous Americans of the Time

George Washington
Patrick Henry
Thomas Jefferson
Samuel Adams
Abigail Adams
John Adams
Paul Revere
Ethan Allen
Benjamin Franklin
John Hancock

While this list seems really long it moved quickly and had an impact. I think the kids really felt injustice at losing something they valued. We left everyone with somewhere between 2-5 skittles and allowed them to eat them saving the rest for later for a review activity.

Then we broke the kids into small groups and moved them through a few stations.

Spy and Secret Messages

1. Invisible Messages: They got to try their hand at using invisible ink to write messages. Use one of the following mixtures to make your own Invisible Ink:

* lemon, grapefruit or orange juice
* milk
* sugar or salt water (teaspoon in a cup of water)
* white vinegar

Use any kind of heavy white writing paper, paper with lines is best kind. Dip a clean pen (not a ball-point) or any instrument with a smooth point, like a toothpick, into the ink. As you write the words will disappear, so hold your finger at the end of the last word to mark your place. When its dry, hold the paper over a bright electric light or a heated pop-up toaster.


2. Book Cifer Code: Think National Treasure, most of the kids understood it from that reference. Pick one page from your favorite book, make sure it has a lot of words on it! Assign numbers to the words on the page to make your own Secret Code. Use the words to compose a message to decode. We had a teacher create the message and they deciphered it.

3. Rebus game
http://www.ushistory.org/march/games/rebus.htm

These were all available at the one station for the kids to try. You would not likely need all.

Almanac Making Station


Tying it to the almanac of the day we had each student make their own book to keep records of the class in. Using crumpled paper bags, white hole punched paper and leather straps the kids made books designed to look old fashioned but fairly low budget. They wound the piece of leather through the holes in the paper and bag and then wrote If you Lived on the front and their names inside. We had enough pages for each week we did to have several sheets for them to fill. They pasted in the work from the previous week (knights) and this week - the outline of causes and spy games.

Food, Discussion and Artifacts

The last station is a catch all station - they get to eat their food - this week was tea and shortbread type cakes. While they are eating I show them pictures from various books the DK Publishing time period books work really well. We also had a tricorn hat from the time period for them to look at. I had set up a water harmonica but we could not make it work. This is the wine goblets with water filled at different levels. After persistence one of the students figured it out and it does sound beautiful if you can figure it out. We had some of our glasses filled too high.

At the end we brought them to review the American Revolution causes. To keep them interested we used candy. I went through my long list above reminding them even if the names sounded strange they could likely figure it out from our experiences before. I rewarded right answers with candy. That was a hit and served as a nice review.

I am always amazed when I type this all out how much we do in the span of a single hour. It is really because we have several teachers there is no way to do all this at one time with one teacher. But maybe divided over a few days you can get it in. I never expect them to have depth just a basic taste and overview of the time period we are learning.

I love teaching history this way because it really seems to bring it alive to kids. They suddenly find history fun and interesting and hopefully some of the details will sink in because they learned them not just by dates but through experience. I know my own kids do really well with this format.

September 22, 2007

Nature Notebook Class


This semester for our homeschool cooperative I am teaching a great and easy class for the 2nd-4th graders, nature notebooking. On the first day I gave a general overview of what nature notebooking was and what sorts of items they might want to include in their books. I gave them only two rules for the book.

1. It doesn't have to be perfect.
2. If God made it you can draw it

Only God made it perfect so all I want you to do is draw from your heart and mind what you see in the way you want to. Then we headed outside.

We had a lovely but breezy day to be outside. Thankfully some flowers survived our first frost in Minnesota and they were able to sit outside near the flowers and sketch. There was a wide variety of what was sketched - trees, spiderwebs, flowers, berries, landscapes, leaf rubbings, moths, grasshoppers, bees, and on the list went.

I think this will be a lovely class - as the kids gain confidence and continue to enjoy themselves. It was a sight to see the kids all spread out in different spots sitting quietly sketching. Some worked very quickly and went through several pages drawing individual items such as a single berry on a page. Others sat for a long time and created complete landscapes.

We encouraged each child to draw for the entire time no matter how many items they sketched and to put the date, location, and time on their pages so they can refer back to them later. They all seemed to enjoy themselves and this is a time I will look forward to each week. In case of unpredictable Minnesota weather I will have field guides, books and pictures for them to sketch from indoors when needed.

April 6, 2007

Easter Lesson Plan


Here are some of the things we do as a family with young children to explain Easter from a biblical perspective.

1. Children's bible versions of the Easter story and all the events around it here.

2. Resurrection Eggs - This is a dozen plastic egg kit that you can purchase at churches, online or Christian book stores or make yourself. Each egg contains an item that is a symbol of part of the Easter story and it is a powerful teaching tool. Here is a sample kit though the exact items can vary from kit to kit.

3. Sinful Heart/Blood of the Cross/Pure Heart
I make white hearts and laminate them then I have the kids use a black
wipe off marker and write each of their sins on the heart. For the younger I
have them just make an X as they tell me each sin. Then I use a red cross (made out of construction paper to symbolizes Jesus' blood) to cover over their heart and I erase the sins and show them how Jesus dying on the cross covered our sins and
makes our hearts pure before God. The heart is then white again, the way God will see our hearts because of Jesus' sacrifice for us. This seems to really bring the
lesson home for younger children.
--A friend of mine suggested modifying this by using a red/pink eraser and making it into the shape of a cross to show the erasing of the sins.

4. Jelly Bean Prayer This is a craft simple craft with a poem and some jelly beans that shows God's love for us with the cross. Print the poem here. Have younger children glue the bean next to each line have older children glue the bean and the copywork the saying or memorize it.

5. Family cross - Each year we make a large family cross with each members of the household represented on it. We take two big pieces of butcher paper and form them
into a cross. Then each family member traces his/her hand and writes
their name on it. We glue the colorful hearts onto the cross and
write Easter and the year on the top and have a heart for Jesus in the
center. We hang this each year to show how Jesus dies for each of our
sins. Then at the end of the year when we take it down to save it we
compare it to last years cross to see how our family has changed
(added members, grown in size, etc), it is a nice tradition to have.

6. Resurrection Cookies - These are cookies you make the night before that also help show the story of Easter. The recipe and details can be found here.

7. Easter night/morning enactment We have not done this before but it looks so good I think we will add this to our routine this year. A fun activity a family created to bring it home to their kids. Read more.

8. Easter morning - We read the Easter story from the actual adult bible. By now the kids are very familiar with the story and can follow along with ease and patience. Then we look for eggs and do some of the traditional secular activities.

March 22, 2007

Plum Creek Lesson Plan Week Three


These are my discussion topics for our Plum Creek class for 2nd-4th graders. We have divided the book up into 6 class periods - so read about 6 chapters before each session and discuss them. Since we draw many of our questions and topics from The Prairie Primer I do not print out the full lesson plan but rather just the topics we discuss. Which is an invaluable resource if you want to teach a class like this. After the discussion time the kids enjoyed fresh biscuts and homemade butter and continued work on their nine-patch quilt pillow


13 - How did their Christmas celebration compare to ours? What do you think of theirs?

15 -Footbridge incident discussion - what happened, lessons about disobedience and slippery slopes. Discuss strategies for not falling into temptation.

James 1:13-15 13When tempted, no one should say, "God is tempting me." For God cannot be tempted by evil, nor does he tempt anyone; 14but each one is tempted when, by his own evil desire, he is dragged away and enticed. 15Then, after desire has conceived, it gives birth to sin; and sin, when it is full-grown, gives birth to death

Strategies for not falling to temptation that leads to sin

1. Realizing it is wrong and admitting it to yourself
2. Realize that it is sin against God
3. Quickly saying no
4. Reciting scripture to ourselves – Jesus used scripture to rebuke the devil when he was tempted in the bible.
5. Not letting ourselves talk ourselves into it as something different
6. Quickly removing ourselves from the temptation


16 – Discussion of the building process of their home and how we move into our homes. What is different and the same. Discuss giving work a lick and a promise

18 – Wading in the creek - comparison of the creek at different seasons. Discussion of the various animals and creatures they discover. Talk about upcoming attending school

February 18, 2007

Plum Creek Lesson Plan

I am co-teaching a Little House class with a friend for our homeschool cooperative. We are basing the class around the On the Banks of Plum Creek book from the Little House series. Plum Creek was a natural choice as it is set in Minnesota not too far from where we live and the girls are 7 and 9 in this book. The children in our class range from 7-10 so it was a perfect fit. Plus we can do an end of the year field trip to Plum Creek if we want.

This past week was a fun class. We have 15 kids in this class both girls and boys and 2nd through 4th grade. We began the class by teaching the kids Oh Susanna - okay honesty here - I did not teach them I tried hard not to sing at all since I can't carry a tune in a bucket. But my co-teacher did a fabulous job.

Then I talked to them about the book - we were discussing chapters 7-12 this week and I engaged them in discussion about a few stories and lessons we could learn from this chapters. First we talked about Laura and Mary sliding down the haystack and the importance of full obedience and not making false distinctions with the rules. We also talked about leading others astray since Laura led Mary in a way she did not at first want to go. We read some bible verses that applied here and made the point of listening to our parents true rules and not making nit picky distinctions and about how we teach our friends and siblings.

Next we talked about when Laura and Mary had to run the cattle away from the haystack. We discussed their initial reactions of staying still and running to help and talked about the fight or flight instinct and being brave even when it is hard.

Then we discussed the Christmas horses and how the girls chose to put their own desires second for Pa's sake and the unselfishness of that. We also read some bible verses here and talked about how Laura prayed for help because it was hard for her. We applied it to their lives and this moved into a natural discussion of how the pioneers depending on God so much.

Other topics we talked about were how the pioneers reused everything they could and wasted nothing. The kids pulled out examples from the book and this was a natural transition into our craft of making a 9 patch quilt pillow.

Before they started the pillow we had a snack of plum jam and bread. We talked about picking plums and how to make jam and read a cute story from the Little House Cookbook as well.

We ended the class with time to work on their 9 patch quilt pillows. The kids had selected their 9 patches from pre-cut quilt squares and laid them out the way they wanted the week before. This week we taught them to make short seams and sew the first three squares together.

Okay another moment of honesty. I don't sew. I mean it, not really at all. I have in the past used a sewing matching to make straight seams (sort of) for my kids diaper wipes when we used cloth diapers. Only because it really did not matter what they looked like. I can put together pieces of a sweater but I hate doing it and the fact that yarn is thicker makes it tolerable to me. However needle and thread and actual sewing and I do not get along.

I warned my co-teacher of this when she had the idea to make the quilts. She realized how honest I was when she discovered I could not thread a needle and tie off the end the right way. Nor did I know whether stitches were too far apart or too close. I was not much help to any of the students and was thankful for the two other moms I had there. It made her laugh and she said "You really weren't kidding" and I assured her that was correct.

Anyway they all managed just fine despite me :) The other women were wonderful and the kids caught on quickly. While they sewed we played a CD called Laura Ingalls Wilder's Songs from Home that I purchased in DeSmet on a Little House Field Trip we did years ago. The CD was filled with fiddle music, songs from the time, short stories about the book and Laura's life as well as some actual voice recording clips of Laura herself.

All in all the class was a success and fun. While I typically print my entire lesson plans in their entirety here I feel I can not as I am often using resources from The Prairie Primer by Margie Gray for this class and I would not want to violate any copyright or her hard work. It is an excellent resource for teaching any Little House class. I have also put together a list of some free Little House Lesson Plan resources.

Look for more updates every few weeks as we teach more classes.

Research Lesson Plan - Week One

My formatting is a bit off but hopefully readable enough for you.

Introduction Week

Who Am I – Lifelong learner, special passion for research, communication and argument. Specialized in grad school in this area, competitive debate and coaching, continued research approach to nearly everything in life.

Expectations for students
Respect for me – in class and in work
Respect for each other
Respect for themselves – do their work and get the skills they came to the class to obtain
Assignments will be neat and preferably typed
Take care of things like spelling and punctuation
Assignments must be turned in on time and be complete


What is research?
What is the value of it? Why is it necessary?

Defining Words

Systematic process of inquiry aimed at discovering, interpreting, and revising facts.
intellectual investigation that produces a greater knowledge
The term research is also used to describe an entire collection of information about a particular subject
Derives from French recherche, from rechercher, to search closely
its literal meaning is 'to investigate thoroughly'.
Re- search what has been discovered before – looking for new details

Make it Personal

Have you ever researched for pure joy or curiosity?
To prove a point?
To prove someone wrong?
To understand something better?
Use examples from my life of research for interest
-new hobbies
-kids vaccines
-homeschooling
-politics, news stories, etc

Difference between knowledge and wisdom and link to research

-knowledge versus wisdom

importance of knowledge – always with you

wisdom in being able to find research

capability within all of us a skill to learn and practice (become second nature)

while we may not know everything we can learn how to research and discover anything therby having the power to gain the knowledge we need over time.

Albert Einstein example

Different Types of Resources – Where to Find Research
-Books
-Internet (variety here)
-Newspapers, Magazines
-Transcripts
-Library vs Internet
Primary/secondary sources – “quotes from books”

Keeping Track of It – Staying Organized
File Folders
Notecards
Book Bag
Google Notebook
Personal Computer
Ipod – phone – pda

MLA Citations

-most commonly used in the humanities
- in high school and college
- review basic structure

First Assignment:

Using your assigned pre-approved topic begin your research process. Keep a file of your research in one central place. For next class you must bring five pieces of research from different resources into class. Bring the ACTUAL resources (the book, the article, etc) as well as a Works Cited page to be handed in.

Possible resources include books, newspapers, magazines, journal articles, encyclopedias, etc. Only two resources can be internet resources and at least one must be a book unless you have prior approval.

The Works Cited page should be typed or written neatly in MLA format. Please consult the handout from class as a guideline for more detailed instructions (only if you wish) consult the MLA Handbook 6th edition. Your handed in assignment will look like the works cited reference sheet (without all the color coding) and you will have with you a stack of resources (articles, books, etc) to present in class.

As always if you have any questions feel free to email me or call me. Remember to start early as research can take more time than you expect.


For samples of MLA Citations please visit http://www.mla.org/style and

http://www.d91.k12.id.us/ifhs/subpages/Media_Center/works_cited.htm

and refer to your handout.

Research Lesson Plan - Week Two

I. Research at the Library

Book Catalog Search
Start General with subject
May need to use Keyword Search
Browsing Through the Nearby Books - sometimes find your best books this way
Encyclopedias or World Book in Juvenile section
-should be used a a starting off point if you need names or ideas for your topic
-often dated and limited information - can offer only a general summary

Online Databases
-limit to full text documents for full article results
-Best one to use (in recommended order)

InfoTrac Student Edition: Designed for high school students, InfoTrac® Student Edition provides indexed and full-text magazines, newspapers, and reference books about current events, the arts, science, popular culture, health, people, government, history, sports and more.

Proquest Newstand Complete: Read the full-text articles of over 350 newspapers. Search the latest news from around the world. Access a wide range of articles – news, arts, sports, and entertainment.

MasterFILE Premier: Read full text articles from more than 1,900 popular and general reference, business, consumer health, general science, and multi-cultural periodicals. It offers indexing and abstracts for an additional 2,510 periodicals. The database also contains full-text articles from book reviews, reference works, travel books, biographies, primary source documents, and an image collection of photos, maps, and flags.

Junior Reference Collection: Nearly 12,000 documents, 8,500 photographs and illustrations, 50 video and audio clips, and significant reference book content are included. Search by subject area–People, Places, Subjects, Authors, Books, and Timeline.

II. Online Research
www.Google.com
This should ALWAYS be your first place to look
Try to be narrow in your search terms
-use quotes
-use keywords from useful links
-re-search and get narrower each time

In general stick to first two pages of results and re-search with new terms
Pay attention to URL's - tell you about credibility and usefulness
Skim about 5 entries at a time BEFORE choosing one to click on
Skim the first few paragraphs to determine if useful
Notice any keywords or useful phrases and re-search those terms in google to pull up similar items
REMEMBER: There is safety in numbers if most of the research is pointing one way it is probably the truth and best way.


URL endings
.com
A commercial web site. Companies or profitable organizations have this type of URL.

.net
Internet Service Providers have this ending to their URL.

.edu
Educational Organizations such as schools or colleges have this ending to their URL.

.org
Nonprofit organizations have this ending to their URL.

.gov
Government organizations have this ending.

.blogspot.com/etc
Blog written by individuals can have wide variety of credentials, legitimacy and purpose.


Exploratory versus Focused Research
-what are the differences
-advatages and disadvantages to both

Discussion of Research Paper versus a Report

Credibility
What are warning signs to indicate a resource is not likely reliable?
-poor spelling, grammar and writing style
-blog or individually published website
-no link or qualifications of person to topic
-conclusions are completely off from the rest of the topics research

What are indicators that it is reliable?
-more research backing it up
-published in a peer reviewed journal
-qualifications of writer
-quality of writing - language conclusions etc

Bias
What are some signs of bias?
-language choice
-hostile or loaded conclusions and word choices
-no counter opinions shown
-research only comes from those with a vested interest
-straw man arguments and misrepresentation of the opposition used as main strategies.


Discussion of next assignment

Next Assignment:
Part 1: Continued Research on Your Topic
Find 5 more resources for your topic. Add them to your MLA citation sheet. Your 10 references total (last weeks and this weeks) need to include the following:
-1 book (more is always good but sometimes hard to find)
-3 magazine/journal/or newspaper references
-2 online references
-The remaining 4 resources can be any of the other or various other resources.

Part 2: Pulling Research from Articles
Read articles on Digital Rights Management through once completely. Go back through the articles and highlight/underline or write out quotes from the articles to support a thesis statement for a potential paper. You are NOT writing the paper - just a thesis statement for your position. You will hand back in your written out thesis statement (the point you would prove or demonstrate in your potential paper) and all 7 pages with your notes and highlighting on them.